MS Visual Studio Code

Microsoft released a free (not open source though) IDE called “Visual Studio Code” or “Code” for short. It has built in code integration the’ve dubbed “IntelliSense” that’s backed by their TypeScript library. Interestingly enough they’ve even released a Linux desktop package.

It seems like Microsoft is trying hard to gain any kind of relevance in the web development space built on the Open Source Software development model — especially in the Nodejs and Angular communities. Building multi-platform tools for web developers is a step in the write direction, but they have a big ditch to dig themselves out of. Any web developer that uses Unix or Linux has to break the association of software quality and Internet Explorer, before really being able to use a Microsoft product for their job.

It my hunch that these products are less for the Unix/Linux converts, but more likely intended for developers already using MS technologies and needing to be developing in either a Unix or Linux environment.

ES6 arrow functions, syntax and lexical scoping

Single line function expressions in ES6 are nice.

function (param) {
  return expression
}

Becomes:

param => expression

Which allows you to write much more readable code. This short walk through discusses some of the new JavaScript features you can be using now in combination with Babel. Assuming you’re using a build step this just makes sense. I’m particularly excited about the lexical scoping of “this” in the fat arrow function, which will allow us to avoid setting ‘var this = that;’, or using .bind(this) or .call(this).

Source

SSL on NGINX with WordPress

Serving websites using the transport layer security (TLS) protocol has several benefits aside from security, and getting HTTPS on NGINX can take as little as 5 minutes.

In addition to offering your users an increased level of security, there are also several other advantages including increased SEO ranking from Google and deeper user trust and confidence in your service.

If you don’t know how to ssh into your server, this article is not for you.

This tutorial is given under the assumption that you’re comfortable using the command line, have sudo/administrator access to your web server, and are running NGINX on an Ubuntu or Debian server, and have a WordPress website you would like to server over HTTPS. This tutorial can be used as a reference for servers that aren’t using WordPress, as the WordPress-specific information is contained within WordPress configuration files and settings.

1. Purchase an SSLMate certificate

First you’ll need to sign up for SSLMate — you can use another service, but the SSLmate part of this tutorial obviously won’t apply. When you sign up for the service initially you’ll add your credit card, but you don’t actually purchase a certificate right off the bat — you do that via the command line, which is pretty neat if you ask me.

2. APT Repo + Install Certificate

Next you’re going to want to add the SSLmate to your sources.list so you can apt-get install the package. They have a page with options to select different servers and you’ll want to visit there if you’re using a server other than Ubuntu 14.04 which is what I’ll be referencing in this example.

The `sudo` prefix in the above commands can be removed if they are run as root user. The SSL mate packages should now be on your server, allowing you to run the purchase command to by the certificate.

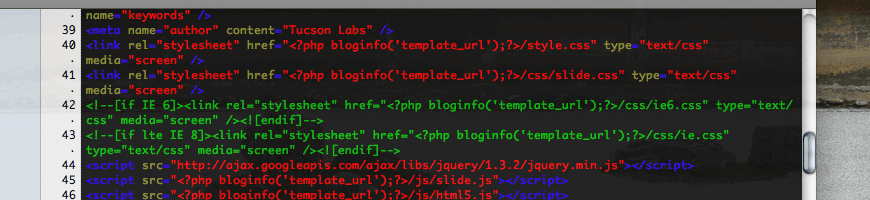
Replacing ‘HOSTNAME.com’ with your website’s name (I used ‘tucsonlabs.com’):

sslmate buy HOSTNAME.com

SSLmate will begin the purchase process, which involves a sending you a confirmation email. It might seem like your server is hanging after you’ve confirmed the purchase, but be patient and your certs should download. When it’s finished you should have 4 files that look something like this:

www.HOSTNAME.com.chain.crt	www.HOSTNAME.com.crt
www.HOSTNAME.com.chained.crt	www.HOSTNAME.com.key

You’ll want to make a directory for these and move them there. SSLmate recommends using /etc/sslmate for NGINX.

sudo mkdir /etc/sslmate
sudo mv www.HOSTNAME.com.chain.crt	www.HOSTNAME.com.crt
www.HOSTNAME.com.chained.crt	www.HOSTNAME.com.key /etc/sslmate

3. Link Certificate / add server block

At this point you have your certificates, but your NGINX server is unaware of them and it’s probably only listening on port 80. To get SSL working, it’s necessary to add the location of the generated keys to a new server block set to listen on port 443. You can also add this to an existing server block, but it should be separate from your default that’s listening on port 80. Don’t nest this server block within another block — they need to be separate. My config files are located in /etc/nginx/sites-available/HOSTNAME.com — yours may be in a different location.

4. Restart NGINX and Verify HTTPS Work

Everything should be set up properly at this point. To test that it’s working restart NGINX.

`sudo service nginx restart`

You should be able to navigate to https://HOSTNAME.com. If you get a sever error here, double check that NGINX restarted correctly and you’ll trouble shoot your errors.

The only thing left to do is add a 301 redirect and force WordPress to use SSL for the sign in and admin pages. At the bottom of your server configuration that’s listening on port 80 you’re going to add a 301 redirect:

5. Configure WordPress to use HTTPS

Sign into your website’s admin panel and navigate to settings, general. Change your WordPress Address and Site Address to use ‘https’ instead of ‘http’ and press save. Next open your website’s wp_config.php file add the following to force SSL on the sign in and admin pages.

define(‘FORCE_SSL_LOGIN’, true);
define(‘FORCE_SSL_ADMIN’, true);

Then restart NGINX server, and you should be set. You may have to search and replace post content for images with an http url to prevent a mixed-content warning from appearing.

6. You’re done, grab a beer!

To recap if you’re using Ubuntu or Debian and running NGNIX, it only takes 5 minutes to server your WordPress site over HTTPS using SSLmate. It’s easy, adds a higher level of trust to your service, offers your users an extra layer of security, and it can improve your website’s search engine ranking with Google.

Resources:

UPDATE: The ssl_certificate should be above the ssl_certificate_key.

Using LESS with CodeKit to compile multiple CSS files

For the past month or so I have been using LESS in combination with CodeKit to author my CSS.

LESS adds a lot features that CSS lacks. It also allows structuring CSS in ways that aren’t practical for a production website or application and I think it’s going to play a large role in the future of web design. CodeKit makes working with LESS a breeze. CodeKit is also compatible with Sass, Stylus, CoffeeScript and Haml (if you’re into that level of abstraction).

LESS and CodeKit for mobile-first, responsive web design

There are two main approaches to building mobile-first, responsive websites. One method is to use multiple linked stylesheets with media queries called directly in the markup. Another is to use a single stylesheet with multiple media queries within it. (Of course with both of these approaches you will need to use a polyfill for old versions of IE or provide a link to a separate IE stylesheet). I prefer the using a single stylesheet because I want to keep HTTP requests to a minimum so our websites are as fast as possible. The drawback to using such an approach is that you may end up having a rather large CSS file which can make editing and debugging more difficult than it needs to be.

Having your cake and eating it too – Compiling multiple LESS files into one with CodeKit

Let’s start by creating a default mobile stylesheet. Since I primarily work with WordPress, I call this file style.less, and keep it in a folder called “less”. If you’re using WordPress, you need to compile it to style.css in the main template directory, otherwise you can place these files wherever you would like.

From within this file, we can import some helper LESS files (also kept in the less directory) near the top of the document. After my requisite WordPress stylesheet header, I have something similar to the following:

@import 'mixins.less'; // Mixins to use in our other LESS files
@import 'normalize.less'; // A reset stylesheet

Mixins are basically predefined styles that you can drop in anywhere in your LESS file. If you’re often using vendor prefixed declarations, they will save you loads of time. Dmitry Fadeyev was nice enough to share his set of mixins, but you can easily make your own. Andy Clarke has also recently released a set of mixins as part of his 320 and Up HTML5 Boilerplate extension which I highly recommend checking out.

The normalize file is basically a CSS reset and you can read more about Normalize.css here. Basically these are files I’m not going to change often and don’t want to be part of my main CSS files. It’s also important to note that if you’re coding a WordPress site, you will need to use LESS rather than CSS as the file extension even if you’re not using any LESS code. This is because CodeKit imports these files above your WordPress stylesheet header which will break your theme. It’s still in beta, so this may be fixed in the future.

After you have your helper LESS files imported, you can begin coding your mobile-first style after these @import calls. When your site is looking good on mobile and you’re ready to work your way up, simply import your media queries like so:

@import url("480.less");
@import url("600.less");
@import url("768.less");
@import url("992.less");
@import url("1382.less");
@import url("2x.less");

From within each LESS file, make your media query calls. In the 480.less file, you would want to put the following to target browsers with a minimum width of 480 pixels :

@media only screen and (min-width: 480px) {
body {
// Put your styles for the body element here
}
} /* end 480 */

Now every time you save a LESS file, CodeKit will compile it all into one CSS file. You now have the flexibility of authoring multiple CSS (LESS) files while serving just one CSS file to your server.

Basic SEO for WordPress theme developers

Generally the last thing people think about when building a WordPress theme is search optimization.

Features and design come first, and search optimization generally comes last or not at all. This article will discuss a few easy steps to make your WordPress theme a little friendlier to search engines. More specifically I’ll concentrated on explaining why it’s a good idea to optimize your WordPress theme, what the key elements of good on page SEO are, and discuss today’s best practices for on page SEO when designing websites that use WordPress as a CMS.

Continue reading “Basic SEO for WordPress theme developers”

Speeding up web development with Firefox

I’m a really big fan of Firefox. I use it daily for simple web browsing and I use it to when I’m going through the process of developing websites. However, as a Linux enthusiast, I really miss the flexibility of Konqueror. It’s an incredibly fast browser with a lot of extremely useful features; especially for web developers. It also has a really good rendering engine. It’s so good that both Apple and Google have put it to work for their own respective web browsers. However, the rendering engine isn’t the only reason Konqueror is so great, it has some nice features that other browsers lack. This article will discuss a simple process of implementing one of my favorite features of Konuqueror in Firefox, as well as list my favorite Firefox plugins. Continue reading “Speeding up web development with Firefox”