This tutorial will focus on a new feature in Inkscape version .47 called spiro splines.
This is a simple technique and might be a bit of a stretch to consider as an actual tutorial. At any rate this is a fun tool with a lot of possible uses. Grab a copy of Inkscape if you don’t have one already and let’s get started.
What are “spiro splines”?
That’s actually a hard question to answer and other people have explained it better than I can.
Using bézier splines an artist can easily draw curves with the same slope on either side of an on-curve point. Spiros, on the other hand, are based on clothoid splines which make it easy to maintain constant curvature as well as constant slope. Such curves will simply look nicer.
https://libspiro.sourceforge.net/
In other words, spiro splines are basically lines that always maintain a smooth curve when you’re editing them. This makes editing curves much easier to do than we’re used to. When you’re moving the nodes (or anchor points for those illustrator converts out there) of spiro splines, the whole path will smoothly curve . Of course you don’t have to use them, nor are the applicable for every situation, but they’re another tool that can definitely com in handy for the right project.
Creating a sprio path
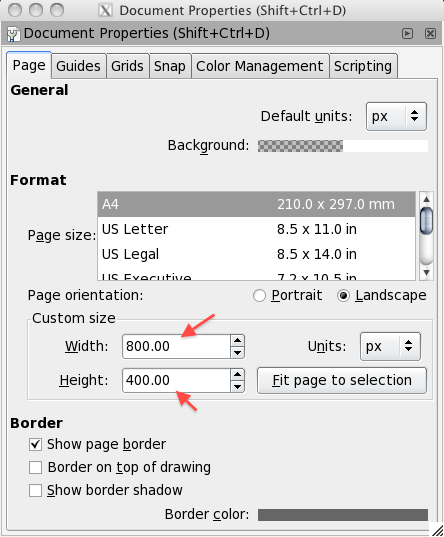
The first thing to do is open up a new document in Inkscape (CTRL + N). You can use the default document size, or if you want to make something similar to the image I have above, set your document size to 800 pixels wide by 400 pixels tall by opening up the Document Properties Preferences. You can get to this from the file menu or the keyboard shortcut (CTRL + SHIFT + D).
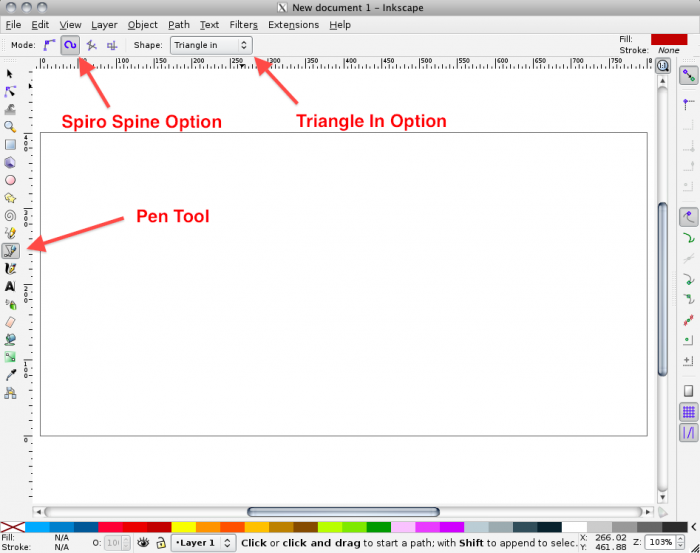
Next you’re going to select the pen tool. With the pen tool selected you’ll want to choose the spiro spline option from the control bar, and for this specific example you’ll also want to select triangle in (or triangle out) from the drop down options.
Now we’re ready to draw. Start from the bottom of your document and move up (or if you’re using the Triangle Out option start from the top and work down). Draw a line with about five nodes (anchor points) in it that curl in towards itself. It should look something like the image below.
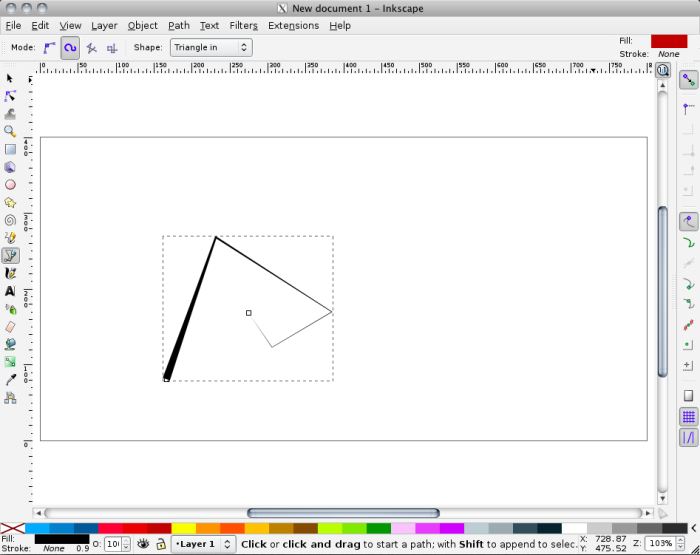
I know what you’re thinking, this doesn’t look anything like a curve. Well that’s true but we’re not done yet. Select the node editor tool and control click on the interior nodes until you see a circle on the node point. Alternatively you could have created the curves by dragging the pen tool as you set each node, but since this is a beginner tutorial I think it’s better to create the path without curves first. You should now have something that looks like the image below.
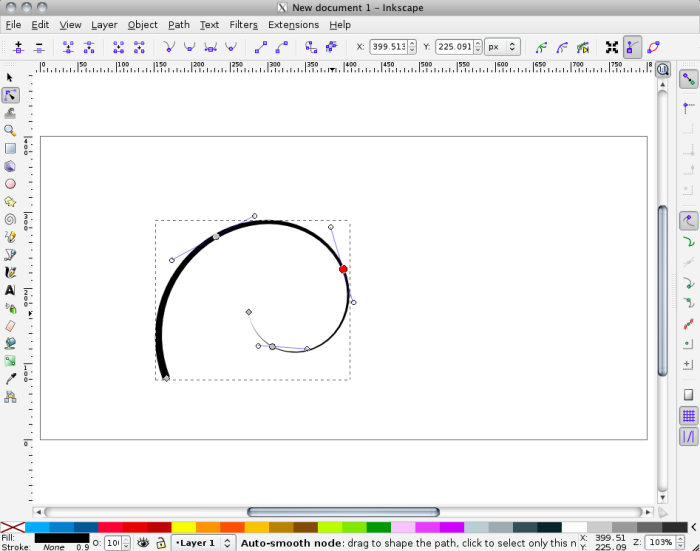
Now you just need to start drawing the rest of your splines, and you have a few options depending on how you like to do things. You can either duplicate the original spline, or freehand draw the rest. You’ll also want to play around with the spline by adding or removing nodes and adjusting their position. You may notice that when you try to draw a smaller tool path that the width of the of your Spiro Spline is a little bit thick. If you want to get this thinner (which I assume that you will), then you’re going to need to do a little extra work.
Draw a new path with the pen tool similar to the first one you did and then open up the Path Effect Editor located under the path menu or by pressing CTRL + SHIFT + 7. Select your new path and then in the Apply New Effect area, click on the Pattern Along Path effect. Then under the Current Effect menu next to Pattern Source, click the edit node icon. You should see a small triangle at the top left of your document. However, if you changed your document size as I did, you probably won’t see anything (this is a bug, but if you’re aware of it it’s fairly easy to work around).
If you’re not seeing the triangle you’ll need to scroll up (or zoom out) to find it because it’s located at the top left corner of the original document size. Click and drag the node and then add another node to create a triangle. You’ll notice that by moving around these node points that it affects your newly created path. For a thicker curve, make your triangle fatter. Likewise to make a curve more narrow, adjust the triangle accordingly.
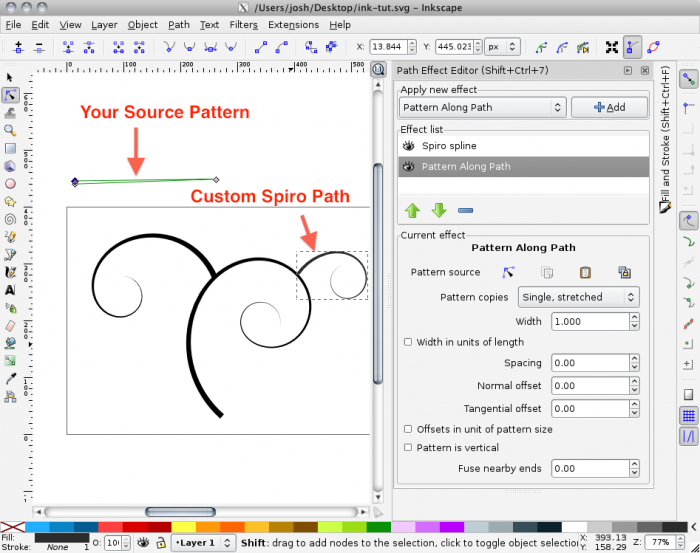
You should have something looking like the image above. If you don’t like the thickness of any given curve, just click on the edit node icon under the Pattern Along Path effect menu and you can edit each individual Spiro path without affecting the others. Keep going and you should eventually have something like the image below.
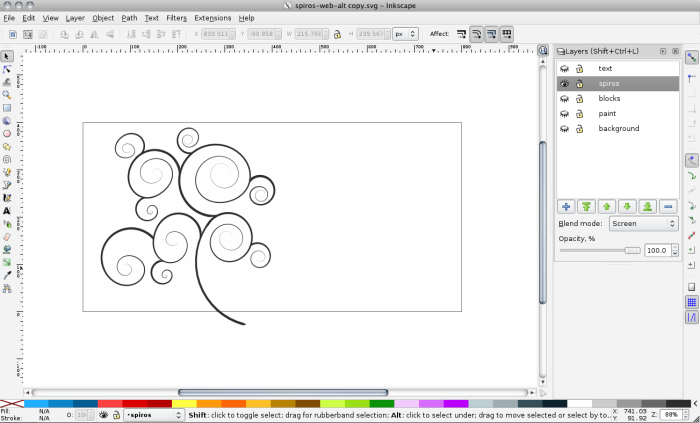
That’s pretty much it. I took it a bit further with my drawing by adding a few layers with different blend modes, background objects, and a few filters to get the finished result.
Have fun!

Yay! I think I have it. Doesn’t look quite as nice as yours, but at least everything happened the way you said it would–almost. Thanks!
Amazing… I love short concise tutorials that work right away :).
Would you to a tutorial on how to understand and master the usage of blend modes and filter? I still find those pretty vague areas I usually venture into but still end out mostly clueless.
Often things end up looking okay, but I wouldn’t have a clue as to how I did it if I were to see it later. Is there a way to obtain such fluency with such thinks to be able to recognize which filters/blend modes/effects have been applied to a image I were to see anywhere? Links to resources would suffice :)
Thanks David! I’ll put those down in my list of future tutorials. It’s tough to get the time, but easier when I know that people are finding them helpful.