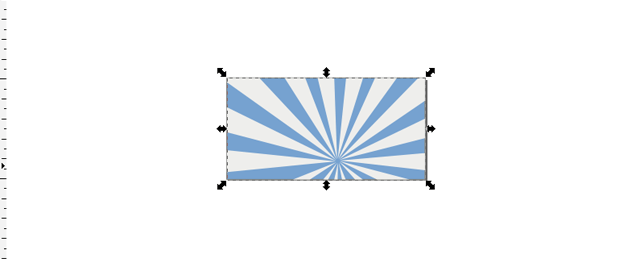
This article will discuss a simple way of creating a star burst background image that is commonly seen throughout the web and in print media. Actually this effect is really being abused now days, but it definitely can look good when done right. This technique is fairly simple and quick, and you only really need to know how to use the pen (or bezier) tool.
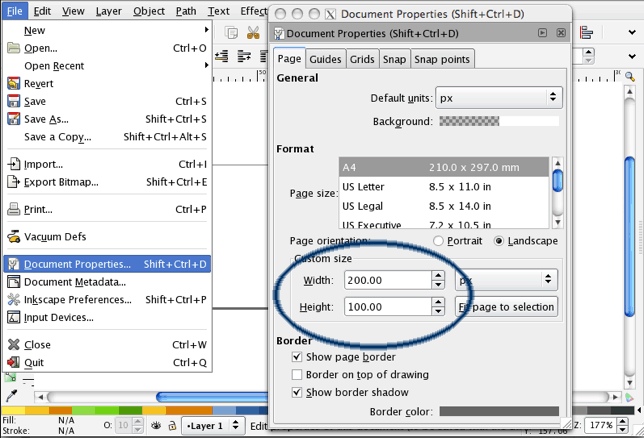
1. Open up Inkscape and set up you document preferences (or press CTRL + SHIFT + D), I have the current document set up to be 200X100 pixels, but pick the dimensions specific to your project.
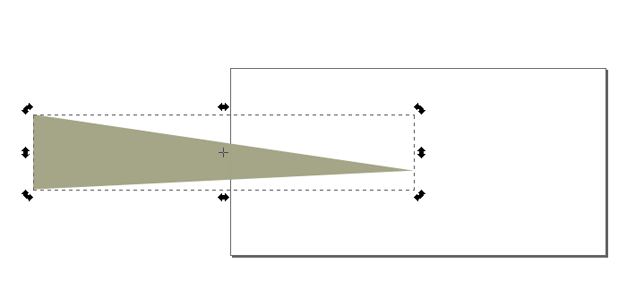
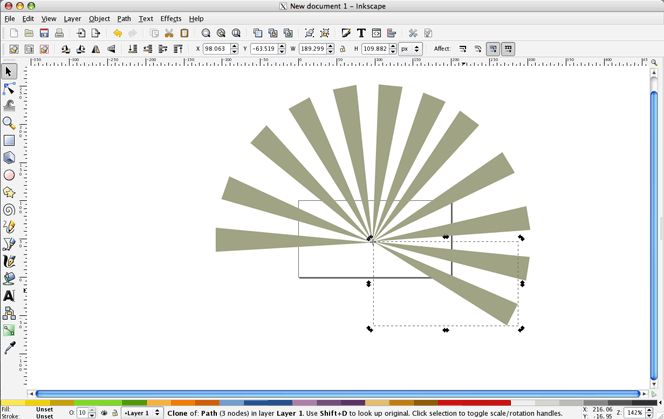
2. Create a long horizontal triangle with the bezier tool (press B or navigate to the pen icon on the toolbar). Your triangle should look like the image below. It doesn’t need to be perfect and the color is up to you. I have the triangle extending beyond the actual page or canvas size, and I suggest you do the same. This document will be exported for the web, so the edges will be cut off in the process. If you’re creating a print document, or a PDF, the same principle applies. However, if you’re using this to import into an existing SVG or AI document, then you will need to trim up the edges and I’ll address this shortly.

3. Select your newly drawn triangle by clicking on it with the select tool ( S is the keyboard shortcut).
4. With the triangle selected you want to create a clone of this object (by pressing ALT-D or navigating to Edit > Clone > Create Clone).
5. Using the select tool, single-click on the triangle clone. Now you should see a cross-hair in its center. If you don’t click again until you do.
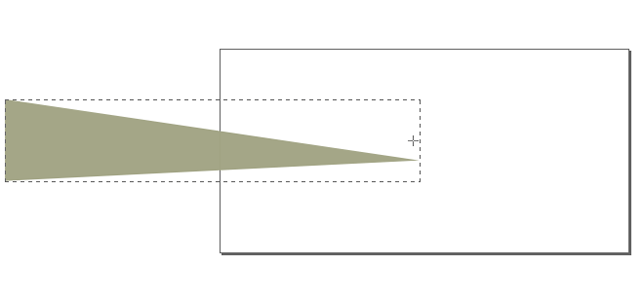
6. Drag the cross hair to the right-center edge of your triangle. It should snap to the center edge of you triangle’s borders, if not you’ll need to adjust the document properties again (CTRL + SHIFT + D > Snap). As you can see from the screen shot below, the point of the triangle isn’t exactly in the center, so you will need to adjust that with the node tool (n). (For viewing purposes, I don’t have the cross hair on the edge, but it does need to be on the edge of the selection marque.)
7. Now rotate your cloned object while simultaneously pressing SPACE BAR at spaced intervals to leave a stamp of your clone. If you’d like your starburst to be evenly spaced, hold down the control key while rotating your cloned object. By default this will be a 15 degree rotation, if you need to change this adjust Inkscape’s steps preferences (CTRL + SHIFT + P). (There is an easier way to do this for more advanced users, and you can view it at Inkscape documents, or from InkScape under help >> tips and tricks.)
Continue creating clones until you’ve made a whole circle. This will give you the basic starburst effect we’re after.
8. Select the original object that we made the clone from earlier. Then open the fill and stroke dialogue box (by pressing CTRL + SHIFT + F) and select a gradient option for the fill. The benefit of using a clone is that all of your objects will now change color and if you need to make any adjustments all of the triangles, you just need to select the original to edit.
If you’d like a background other than white, use the rectangle tool (R) to create a rectangle, then send it to the bottom of the document (Object > Lower to Bottom or END). Of course you’ll need to choose a color that you like for this as well.
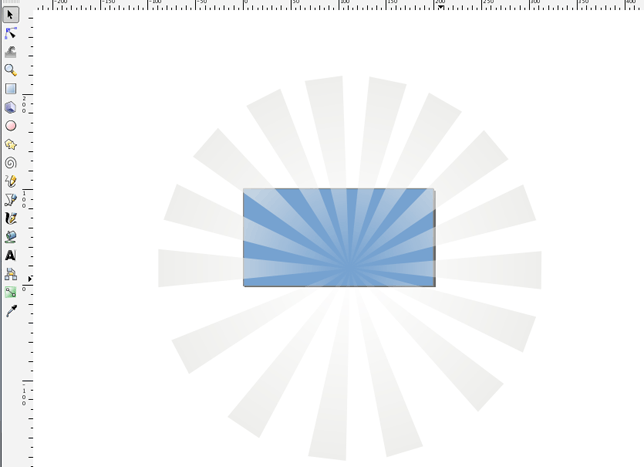
That’s it. You can export it as a PNG for GIMP or Photoshop to use as a background or edit further. To export to PNG just hit CTRL + SHIFT + E and be sure you select the PAGE option.
As I mentioned earlier, some of you may need to use this in another vector project and can’t have the edges extending beyond your canvas. If this is the case for you keep reading, but it’s a little more advanced.
There are a few options available, but I think the best is to edit the objects individually even though it’s kind of time consuming. First you need to select all of your clones and unlink them (Edit > Clones > Unlink Clone or SHIFT + ALT + D). With all of your objects still selected, we are going to combine them into one object by pressing CTRL + K. Below is what it should look like when you click on the new object with the node tool.
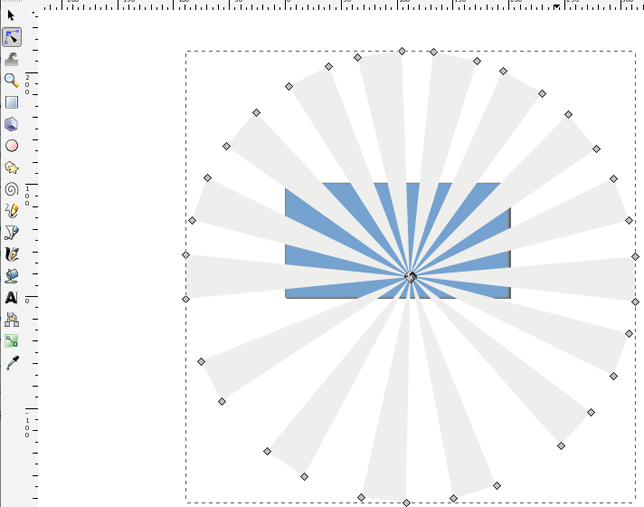
Now draw a large circle with the ellipse tool (E). It should be larger than the starburst. Now if you made a rectangle for the background, select that and duplicate it. If you don’t have a rectangle for the background, create one the size of your document. Bring this object to the front (HOME). Select your new duplicate rectangle and the circle with the select tool by holding down SHIFT. Now choose Path > Difference.
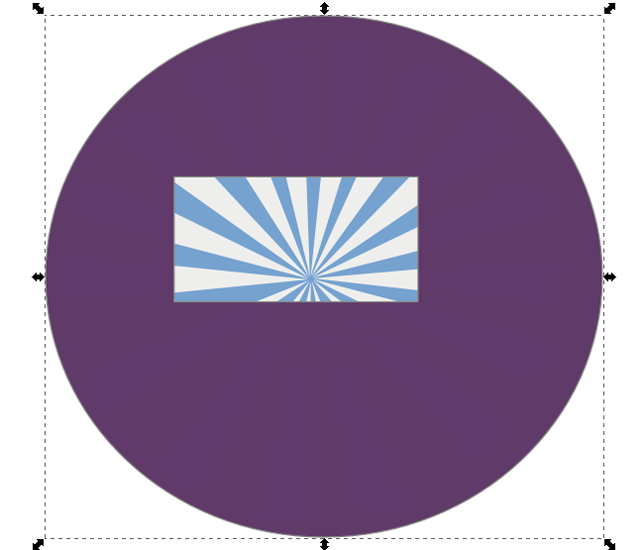
Now select the starburst object and the circle and perform the difference operation again. And you should end up with your finished project. Of course you might need to adjust the colors or gradients again.
Broken image links, man. I can’t see what you’re doin’
Thanks for pointing that out. There must have been a few files that didn’t get transferred when I switched servers.
very nice tutorial, very helpful.
Thanks for this tutorial, very helpful. :)
nice tutorial
i love inkscape
Brilliant tutorial. Thank you, this is just what I was looking for :D