With version 0.46, Inkscape released a new feature called “pattern along path”, which amounts to what you would call brushes in Adobe Illustrator. Although there are a few big differences in using brushes in Inkscape, it’s relatively easy to get the hang. I’ll walk you though how make and use brushes for your drawings.
Create a new drawing
Open up Inkscape (you’ll need to be using version .46 or higher). It’s a good idea to edit the document size (CTRL + SHIFT + D) to what ever you’d like the final design to be used for. I’m setting my page size to 664px by 200px for the above drawing, but you can choose something different or just use the default.
Draw a Brush
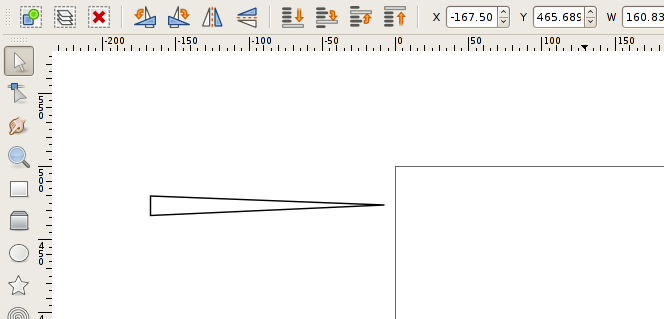
Using the bezier tool (Shift + F6), draw a triangle off to the left (or right) side of the document.

You’ll likely want to make you own brushes for your own design, but for those of you that don’t have the time, I’ve made a set of free vector brushes for Inkscape (you can use these plain SVG brushes for Illustrator as well) so you can download and import them into you design. However, if you prefer making your own it’s a simple process and you’ll be able to get exactly the bushes that you need.
Apply the brush to a path
The process I generally use is as follows:
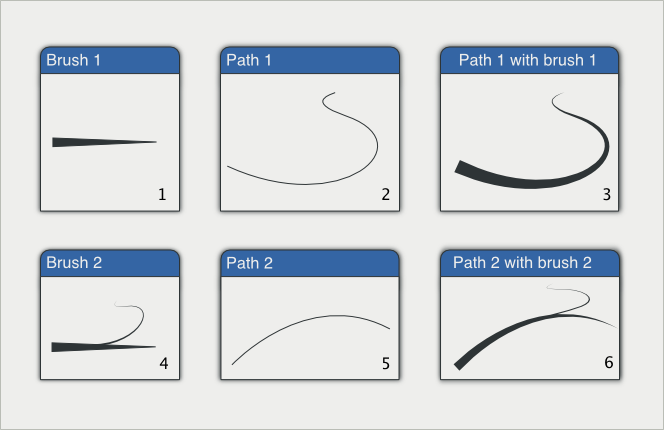
- 1.) make a simple brush (like the triangle above in image 1).
- 2.) Draw a curve (path) with the bezier tool.
- 3.) Apply the brush to the path. This is done by copying the brush (CTRL + C), then selecting the path you would like the brush applied to. Opening the path effects menu (CTRL + SHIFT + 7), then selecting pattern to path from the drop down and click on the past icon button.
- 4.) Convert the new object a path (CTRL + SHIFT + C) and scale the new object down. Then duplicate the original brush and make a union with of these two objects (brush 1 and path 1 with the brush applied). To make a union select both objects (SHIFT + CLICK) and press (CTRL + +). The diagram below illustrates this technique.

After you make one brush, it’s a good idea to duplicate it (CTRL + D), flip it horizontally (H), and then move below your original brush. This will give you greater flexibility if the brush isn’t pointing in the direction you intended.
Once you’ve downloaded the brushes or created your own draw a random curved line with the bezier tool (SHIFT +F6) from the left side of the page. Now apply a brush to this new path by copying the brush (select the brush and press (CTRL + C) and then selecting the path and pasting the brush using the path effects, pattern along path utility).
Repeat this technique using different brushes and you should be able to come up with some unique designs. Feel free to leave a comment.
thanks!
i’m looking for a way to jump from mac to linux…
Thanks for a wonderful tutorial, you helped me so much!!!
Rob
That is so amazing, and simple.
Thank you!!!